You are a coffee enthusiast, eager to elevate your home brewing skills, or a professional barista, looking to refine your craft? Well, this article is your compass to navigating the intricate realm of espresso extraction.
If you’ve seen my article on how to pull an espresso shot, you already know that behind this seemingly simple process lies a complex world of variables, techniques, and science. To deepen your awareness of how you can impact the results further, I decided to introduce a few common espresso measurements and formulyou as.
Click for Quick Navigation:
- Defining Espresso Brew Ratio (EBR) and Formula (EBF)
- Espresso Strength Definition
- Defining Espresso Extraction & How It’s Measured
- Effects of Extraction % on Espresso Flavor (+ Tips on How to Fine-Tune a shot)
- Coffee Refractometers: Discussion
- Do You Really Need a Refractometer for Home Use? Explained.
- How to Use a Coffee Refractometer to Measure Espresso TDS
In this guide, I also explain how to use a coffee refractometer and what its readings tell you about the shot you’ve pulled.
Before we start, let’s have a look at the two most commonly used calculations in espresso brewing:
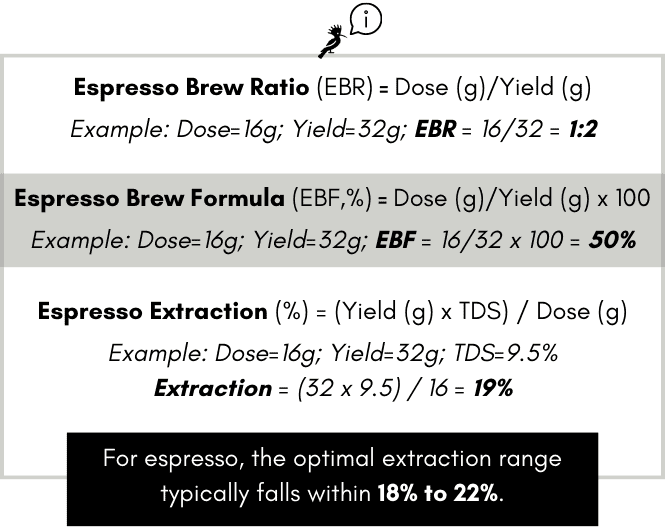
- Espresso Brew Ratio (EBR) calculation: Dose/Yield. For example, if you prepare an espresso shot with 16 grams of beans and you yield 32 grams shot, the EBR is going to be 1:2 (16/32).
- Espresso Brew Formula (EBF, %) calculation: Dose/Yield x 100. The EBF of a 32-gram shot that is prepared with a dry dose of 16 grams is 50% (16/32 x 100).
What is ‘Coffee Body/Mouthfeel’: it refers to the tactile sensation or weight, perceived on the tongue.
Now that we have the basics out of our way, let’s explore further.
What is Espresso Strength?
Espresso strength is defined by the concentration of Total Dissolved Solids (TDS) within a shot. The measurement of strength is TDS. To measure the concentration of dissolved substances, present in an espresso shot, you need to use a refractometer.
TDS is typically represented as a percentage. Simply put, it serves as a measure of the amount of dissolved coffee within your espresso shot.
As a basic guideline, you should know that the TDS of a regular espresso shot should be between 8% and 11%.
Respectively, if you’re pulling a lungo shot, the concentration of dissolved solids should be within the range of 5% and 8%.
It’s widely accepted that the ideal TDS range for a ristretto shot is between 11% and 18%.
If you want to learn the differences between espresso, ristretto, and lungo, check out this post.
For instance, the caffeine content depends on many variables, one of which is the type of coffee beans you use. Robusta beans generally have twice the amount of caffeine, compared to Arabica beans. So a Robusta shot with lower TDS may have a higher caffeine content, compared to an Arabica shot with higher TDS.
What is Espresso Extraction?
Espresso extraction refers to the degree to which the coffee grounds have been dissolved and infused into the final brew. It’s typically expressed as a percentage and it’s calculated with the following formula:
Espresso Extraction (%) = (Yield x TDS) / Dose
The ideal extraction range for espresso is between 18% and 22%.
Author’s Note: There are occasions when the extraction percentage doesn’t fall within the ideal range but shot can be described as “perfect”.
To illustrate, I’ve experimented with Robusta coffee beans that were roasted to a dark profile, and I discovered that the optimal extraction for the most delightful espresso shot was precisely 17%.
In contrast, I’ve successfully accentuated the exquisite flavors of lightly roasted Ethiopian beans by achieving an extraction that exceeds 22%.
Effects of Extraction on Flavor
Not all flavor compounds of coffee are pleasant. If the extraction percentage isn’t within the ideal range, the undesirable flavors and aromas will likely dominate and ruin your espresso shot.
As mentioned earlier, there are occasional deviations from this rule.
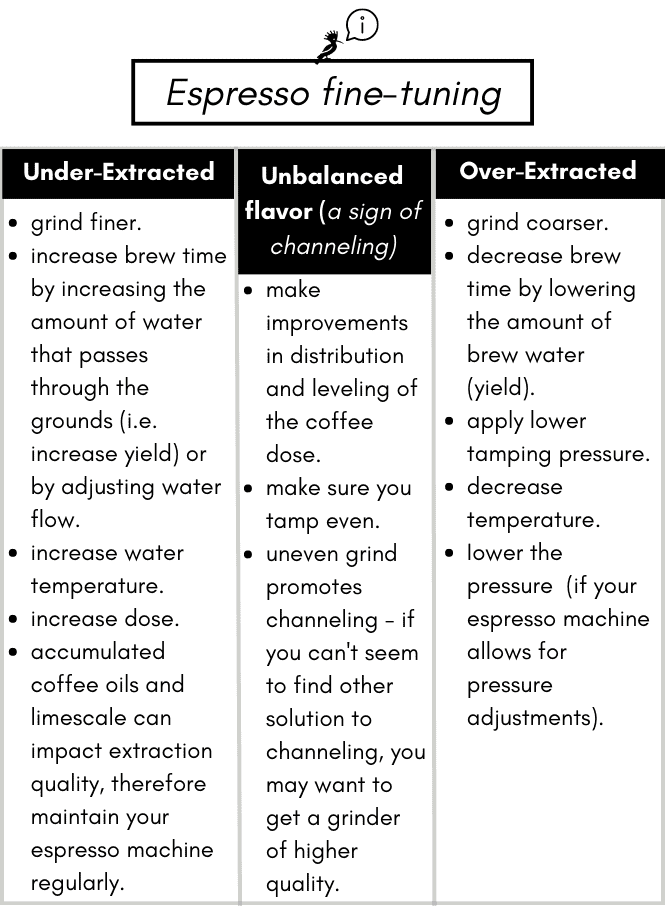
However, most times, if the shot is under-extracted (below 18%) you will likely describe your coffee with adjectives such as highly acidic, sour, salty, with a quick finish, and overall – underwhelming.
Over-extracted (extraction above 22%) espresso would be often described as burnt, bitter, dry, astringent, and flat.
The perfectly balanced shot within the ideal extraction range of 18% to 22% will be sweet, ripe, and mouth-filling, with complex acidity and creamy texture.
The ideal shot would represent the perfect balance between sourness and bitterness. It successfully captures the complexity of the intrinsic and roast flavors of the beans in the most palatable way.

Important! Your palette is your best guide when deciding what adjustments to make to improve the flavor of your homemade espresso. Even if the extraction percentage is within the ideal range, you may sense an imbalance in the overall taste. This may be caused by channeling in the coffee puck.
In such cases, some coffee particles get over-extracted, while others – under-extracted. For tips on how to avoid channeling, check out my complete guide on how to pull an espresso shot.
Achieving the perfect espresso extraction requires experimentation and practice. If you keep track of your adjustments, taste the results, and make further refinements, you will inevitably reach the desired strength, flavor, and balance in your espresso shot.
Here are some ideas on ways to fine-tune espresso variables to improve flavor:
Those of you who own a refractometer and want to measure coffee TDS and extraction, can use a free app like “Optimal Coffee Extraction”.

You can download it on your phone, enter the formula variables and easily calculate extraction. With this type of app you can also keep track of your samples by naming them, adding notes, and saving them to remember your thoughts on a particular shot.
Coffee Refractometers: Discussion
Before we jump into the step-by-step guide on how to measure coffee TDS with a refractometer, it’s necessary to mention that these devices aren’t cheap. Especially if you’re looking for an accurate and reliable refractometer.
The brands that are most widely used within the coffee community are Atago and VST. Based on my experience, they give the most accurate and consistent TDS readings.
For reference, you can visit this Amazon link to see the price of the Atago PAL refractometer. It shows both TDS and Brix measurements and it’s quite reliable.
TDS is the most valuable tool for calibrating the extraction of coffee. With that being said, there are cheaper refractometer alternatives, such as this digital Brix refractometer by FJDynamics.
If you use one of these you should multiply the Brix measurement by 0.85 to get the approximate TDS measurement, needed for the calculation of the coffee extraction formula.
The thing is that many passionate coffee enthusiasts think that cheaper Brix refractometers aren’t worth it. Such devices are rather inaccurate. In my experience, their readings vary within a significantly wide range when testing the same sample multiple times. This can get annoying if you’re trying to be precise.
Do You Actually Need a Coffee Refractometer for Home Use?
To be honest, not really.
Even roasters and coffee shop owners don’t use it on a daily basis. You can easily fine-tune the brewing variables, solely guided by flavor. Of course, you can buy a refractometer if you want to see how flavor can easily be explained with the extraction percentage. Or see how sometimes the extraction percentage is within the ideal range, but the shot tastes bad because of uneven extraction.
This can be quite intriguing for a coffee geek. But it’s not a necessity.
And you will likely use your $400+ refractometer only a couple of times before you completely forget about it. So it may not be worth the investment, considering it’s not part of your essential coffee kit.
How to Use a Refractometer for Coffee
The specific steps may vary depending on the refractometer model and manufacturer’s instructions. It’s crucial to familiarize yourself with the specific guideline, provided with your refractometer to ensure accurate measurements and proper maintenance.
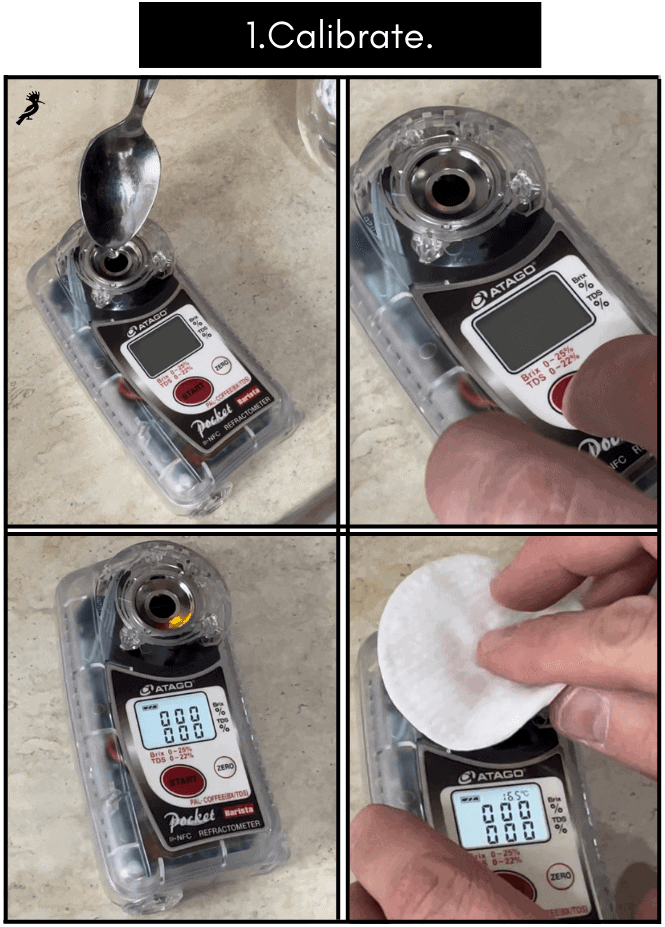
For this guide, we used an Atago refractometer that you can see in the photos below.
With that being said, here’s how to use a coffee refractometer:
- Calibrate the refractometer with distilled water.

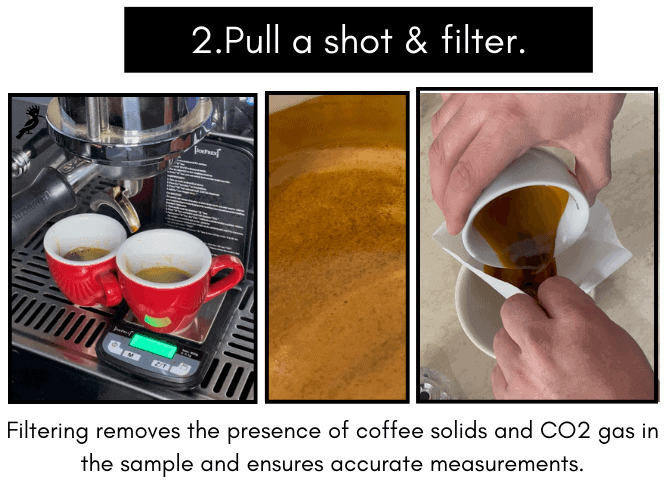
- Pull a shot and run it through a filter to remove solids and CO2 gas. This step is necessary whenever you measure the TDS of espresso or coffee that’s filtered with a metal filter.

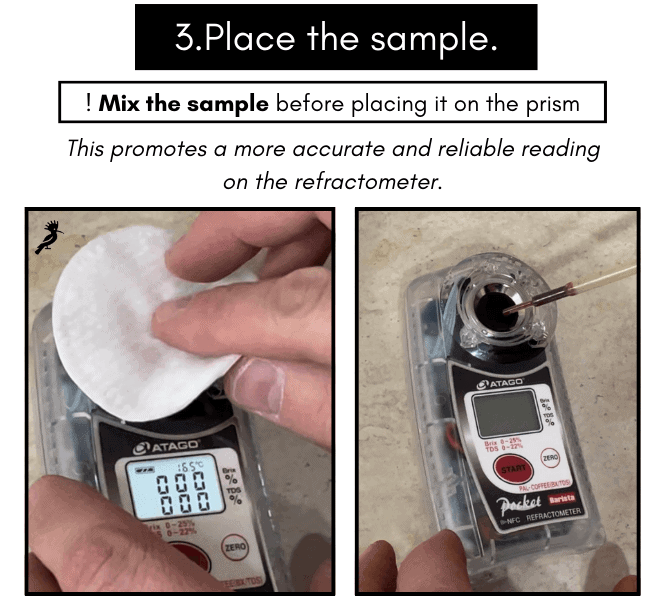
The best option is to use a syringe filter (such as these by VST), but I find them too expensive. So we used a Hario V60 paper for the purpose. - Wipe the refractometer prism with a cotton pad and place the coffee sample onto the prism.

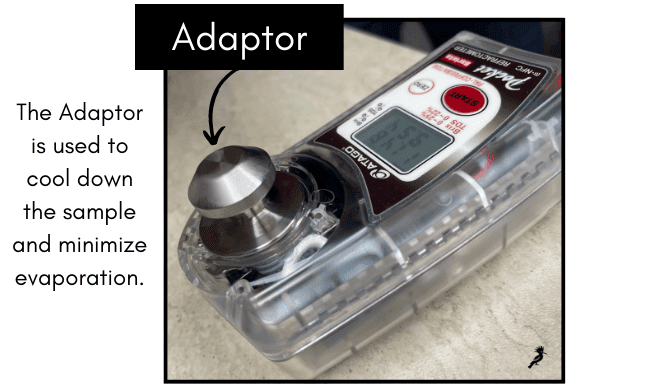
You can also use a adaptor to cool down the sample and minimize evaporation.

- Click “Start” and record reading.

- Clean the prism again to remove any coffee residue.
- Repeat for multiple samples until you achieve the desired result.

Final Words
I hope that you found something useful in this post. Leave me a comment below to ask me a question, or share your thoughts or experience.