With this Japanese dripper, you can easily make outstanding coffee, which is why it has become the go-to pour-over device for baristas and coffee enthusiasts around the world.
In this article, you will find out how to make a flavorful cup with a Hario V60 by following an easy recipe.
There are actually different V60 techniques that you can use to make your coffee.
Тhis brew guide has both beginner-friendly and advanced directions.
You’ll get tips on grind size, coffee-to-water ratio and drawdown time.
Furthermore, for those who don’t have a scale, I made sure to include information on how many scoops of grounds you need for, say, 1 or 2 cups of V60 coffee.
So if you’re having some hard time reading the Japanese instructions that come with your Hario pour-over kit, don’t worry, I got your back.
Hario V60: Essential Recipe Elements
In order to make an amazing cup of coffe with a Hario V60, there are some essential recipe elements that you need to focus on:
- Grind Size.
- Coffee-to-water ratio.
- Brew water temperature.
- Draw down time.
Of course, the type of coffee beans and the water you’re using when brewing V60 coffee have the largest impact on the final result.
You just can’t achieve the best-tasting cup with generic coffee beans from the supermarket.
Furthermore, the water you’re using should be odorless with moderate hardness and alkalinity.
Related Post: Best Water For Coffee
Still, there’s nothing wrong if you’re not that rigorous about your coffee’s flavor.
If you’re satisfied with a cup made with tap water and pre-ground generic coffee beans, that’s totatlly fine.
After all, not all of us are that passionate about coffee.
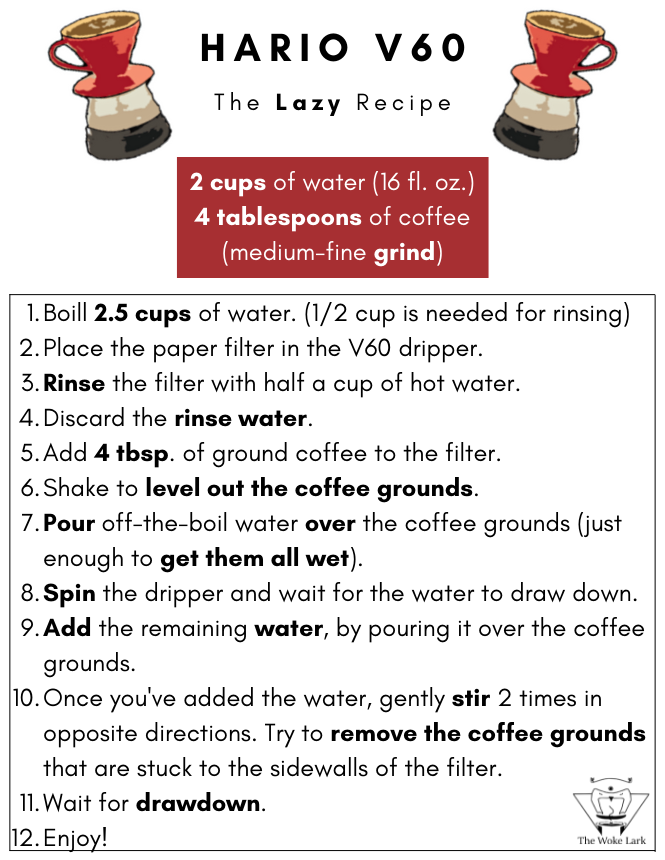
For those of you who want a quick and easy guide on how to use this pour-over device, check out the following picture in which you can find a lazy Hario V60 recipe:
The Hario V60 brewing tips that follow are for those who want to step up their coffee brewing game.
So let’s go over the essential Hario V60 recipe components in detail.
V60 Grind Size
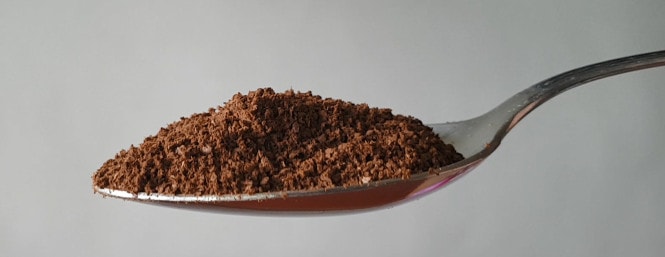
To make coffee with a Hario V60 pour-over device, you need to use a medium-fine grind.
In the following photo you can see the grind size I’d go for when brewing coffee with a V60.

Author’s Note: Grind size is rather hard to communicate, as you should always make adjustments depending on the characteristics of the coffee beans you’re using.
For example, I’d grind dark roasts a bit coarser than light roasts.

Furhtermore, if I am to brew one cup of coffee with my Hario V60 02 dripper, I’d sometimes grind slightly finer to slow down the draw down and make sure the coffee is well-extracted.
Of course, you can also use pre-ground coffee, but for the best flavor, I recommend grinding right before brewing. You can check out my guide on the best grinders for pour-over if you want to invest in a burr grinder that will take your V60 coffee experience to the next level.
There are some affordable devices that can help you step up your coffee brewing game. For example, for this V60 brewing guide I used the Timemore Chestnut C2 grinder (you can click the link to check it out on Amazon).

It’s a rather non-expensive manual grinder that provides the needed consistency on coarser pour-over settings. It’s capacity allows you to grind for 2 cups of V60 coffee at a time, as it holds 27-30 grams.
Furthermore, if you grind your beans at home, you will have more control over the whole brewing process.
In other words, you will be able to make grind adjustments after each brew, to improve the flavor of your Hario V60 coffee.
V60 Coffee Ratio
The most commonly used Hario V60 coffee-to-water ratio is 1:17. This means 30 grams (1 oz.) of ground coffee to 500 milliliters (17 fl. oz.) of water.
One rounded tablespoon of ground coffee is usually around 7-8 grams.
If you don’t have a scale, you can use 4 rounded tablespoons of coffee for a 500 ml (17 fl. oz.) of water when making coffee with a Hario V60 dripper.
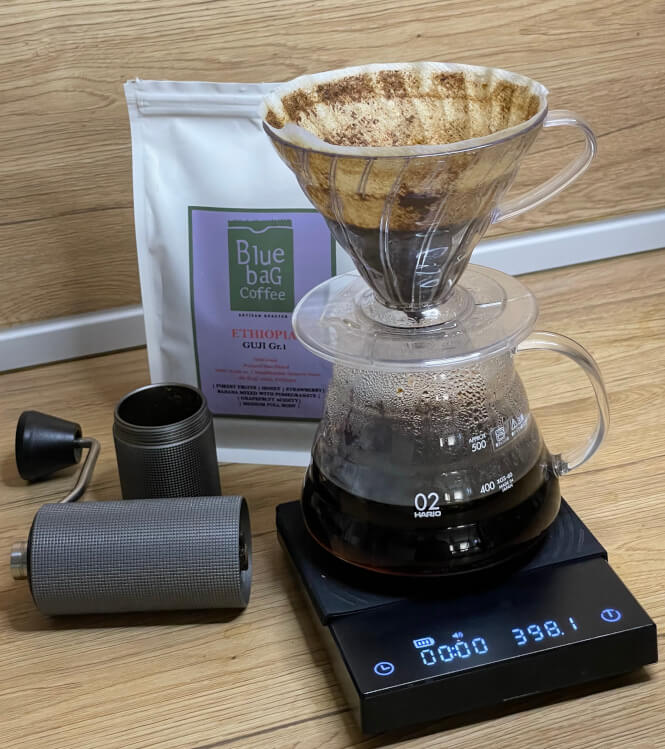
I like using a higher 1:15 coffee-to-water ratio when brewing coffee with my Hario V60 02 dripper. I’d normally brew with a coffee dose of 27 grams and 400 ml of water, which results in a brew of 350 ml (around 12 fl. oz.). This amount is ideal for 2 cups of coffee.
Remember – are no hard and fast rules!
Therefore, you can always make adjustments to the V60 ratio, depending on your personal taste and the characteristics of the coffee beans you’re using.
For example, if I am to use coffee of a lighter roast, I’d sometimes go for the 1:17 ratio, as it results in a more complex flavor.

You can use the following V60 coffee ratio chart as a basic guidelilne when brewing with a Hario dripper:
| Water | 1 to 17 Ratio Ground Coffee |
1 to 15 Ratio Ground Coffee |
|---|---|---|
| 225 milliliters (7.6 fl. oz.) | 13 grams (0.4 oz.) 2 tablespoons |
15 grams (0.52 oz.) 2-2.5 tablespoons |
| 400 milliliters (13.52 fl. oz.) | 24 grams (0.84 oz.) 3-3.5 tablespoons |
27 grams (0.95 oz.) 4 tablespoons |
| 500 milliliters (16.9 fl. oz.) | 30 grams (1 oz.) 4 tablespoons |
33 grams (1.2 oz.) 4.5 tablespoons |
| 600 milliliters (13.52 fl. oz.) | 35 grams (1.2 oz.) 4.5-5 tablespoons |
40 grams (1.4 oz.) 5.5-6 tablespoons |
| 750 milliliters (25.36 fl. oz.) | 44 grams (1.55 oz.) 6-7 tablespoons |
50 grams (1.8 oz.) 7-8 tablespoons |
| 1 liter (34 fl. oz.) | 60 grams (2.1 oz.) 8-10 tablespoons |
67 grams (2.4 oz.) 9-11 tablespoons |
If you are to make Hario V60 coffee daily, I highly recommend investing in a reliable coffee scale that has a 0.1 gram accuracy.
This way it will be much easier for you to achieve consistent results brew after brew. For this particular Hario V60 guide I used my Timemore Black Mirror digital scale.
It’s accurate, affordable, rechargeable, and it looks great. You can check out its price on Amazon by clicking here.
V60 Water Temperature
When making coffee with a Hario V60 I recommend using 200°F – 205°F (93 °C – 96°C) water (off-the-boil water).
The high temperature ensures proper coffee extraction.
By using off-the-boil water, you maintain the temperature in the filter cone high during brewing.
This is essential if you’re trying to pull the pleasant subtle flavors out of your specialty coffee beans.
The maintainance of the thermal mass while brewing with a Hario V60 is harder if you use a ceramic or a glass dripper.
That’s the reason why I prefer using a plastic Hario V60 cone – it’s better at heat retention.
Furthermore, the plastic dripper doesn’t get to hot on the outside. This makes it easy for you to grab the cone while brewing.

With that being said, if you have a, say, ceramic dripper, make sure that the water you’re pouring over is as hot as possible.
This way you will compensate for the heat loss caused by the material of the dripper.
If you’re making coffee with darkly roasted beans, you can use a lower temperature water – 185°F – 194°F (85°C – 90°C).
This is so, as dark roasts extract easier.
For that reason, if you use a higher temperature with dark roast coffee, you may get Hario V60 cup with burnt flavor or unpleasantly pronounced bitterness.

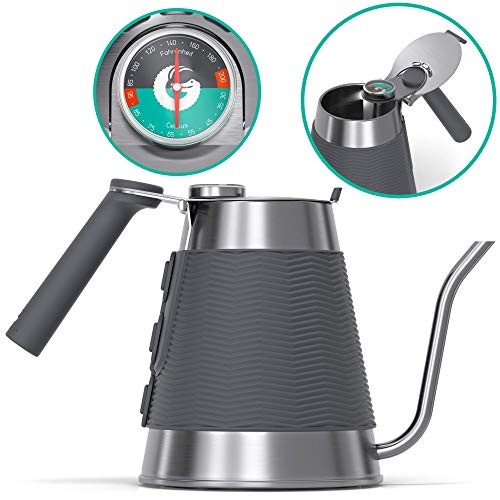
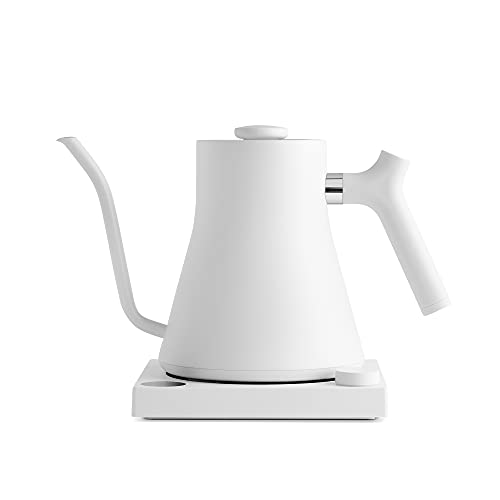
Author’s Note: I recommend checking out my guide on the best gooseneck kettles. There you can find some great electric and stovetop product recommendations that have built-in thermometers.
Said kettles will make it much easier for you to keep an eye on the temperature of your brew water. Furhtermore, the gooseneck spout will provide the necessary pouring control while you pour the water over the coffee bed.
For this recipe I used the gooseneck kettle by Coffee Gator. It’s a stovetop kettle that’s durable and has a reliable built-in thermometer.
V60 Drawdown Time
The drawdown time is the total amount of time it takes for all the water to pass through the coffee bed.
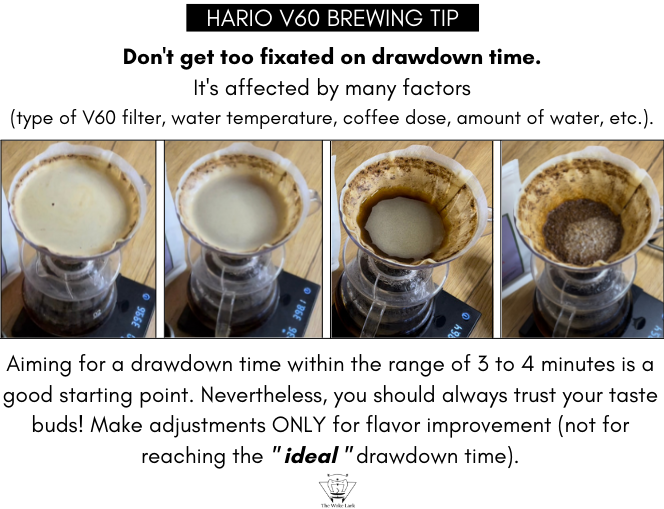
It’s commonly accepted that the ideal Hario V60 drawdown time is 3 minutes and 30 seconds. With that being said, you shouldn’t get too fixated on this number.
There are several factors that influence the drawdown time. These factors include the type of filters you’re using, the coffee dose, the grind size, and even water temperature.
For example, if you are making a Hario V60 brew for one with 225 ml of water and 13 grams of coffee, the drawdown may only take 2 and a half minutes.
This can be totally fine, as long as you enjoy how your coffee turned out. After all, it’s all about flavor.
Even if the brew is within the ideal drawdawn range of 3 to 4 minutes, but your coffee turns out harsh, bitter and burnt, you’d want to grind coarser. This may result in a shorter drawdown below 3 minutes. But your coffee will taste much better, which should ultimately be your main focus.
Contrarily, if your your Hario V60 brew takes 4 and a half minutes, but you enjoy the final flavor of the coffee, trust your taste buds and make no adjustments whatsoever.
With that being said, you can use the drawdown range of 3 to 4 minutes as a basic guideline that will make it easier for you as a beginner.
Hario V60: Step-by-step Brew Guide Instructions
In this guide I will include 2 Hario V60 recipes.
The first one I’d normally use when brewing 2 cups with my Hario 02 dripper. I use the 1:15 ratio – 400 grams (14 oz.) of water and 27 grams (0.84 oz.) of ground coffee (around 4 tablespoons). This ratio yields around 350 ml of coffee (around 12 fl. oz.) or two 6 fl. oz. cups.
The following brewing guide is pretty much my take on James Hoffmann’s and Scot Rao’s recipes. It will help you make amazing pour-over coffee, but you can always tweak it according to your personal preferences.
So here are the Hario V60 Brew Guide Recipe Instructions:
1. Rinse the Hario V60 filter with hot water.
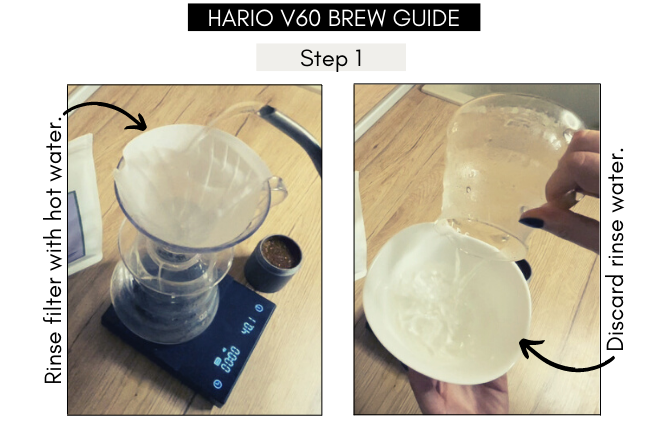
Rinsing the filter is essential. This step minimizes the flavor impact of the filter on your brew. If you don’t the filter, it may add some paper notes to your coffee, which we’d all want to avoid.
2. Add 27 grams of coffee grounds.

Check out the V60 ratio chart earlier in the post, if you want to brew more or less than 2 cups at a time.
3. Shake to even the coffee bed and zero-out the scale.

When making coffee with a Hario V60, I’d usually make a cone-shaped hole in the coffee bed with my fingers. This makes it easier to easily get all of the coffee grounds wet during the initial pour.
4. Pre-wet/Bloom the coffee grounds with 80 grams of water.

When you first pour water over the dry coffee grounds, they release CO2 gases and small bubbles form on the surface of the slurry.
The more recent the roast date – the more bubbles are formed.
This phase in coffee brewing is also known as ‘blooming’ phase.
If you don’t pre-wet all of the coffee grounds before the second pour, the bubbles will continue to form throughout the brewing process, and will mess up the extraction.
Therefore during the initial pour, you should make sure to soak well all of the grounds.
I’d usually pour off-the-boil water that weighs 2 to 3 times the weight of the coffee dose. With a coffee dose of 27 grams, I’d pre-wet with 80 grams of water.
Try to soak all of the grounds as fast as possible (within 10 seconds). Then grab the cone and the V60 carafe, and swirl the slurry. This way you will make sure the water has reached 100% of the coffee grounds.
After the spin, wait for the coffee to draw down.
The blooming phase should last 30 to 45 seconds.
5. Add the remaining water until the timer reads 2-2:15 minutes.
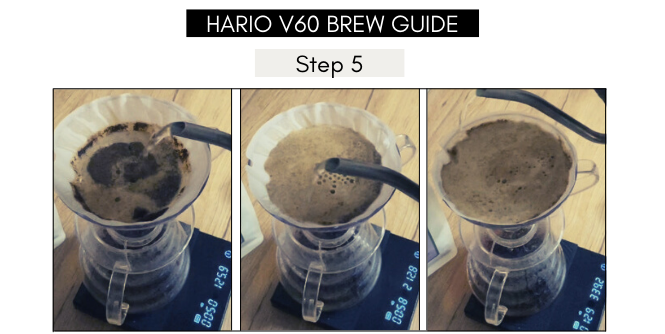
After the first pour, I’d continue pouring until the cone is topped up. Make sure you distribute the water over the coffee grounds gently, with a circular motion.
When you first disrupt the coffee bed, create some agitation, but don’t go overboard. Once the V60 filter is full to the top, I’d wait a bit.
Then I’ll continue to top it up until I reach the goal of 400 grams of water.
6. Gently Stir and Swirl.

After reaching the goal water weight, I’d gently stir in opposite directions. Make sure you knock out as much of the grounds that are stuck to the sidewalls of the paper.
Then I’d wait for the coffee to draw down a bit.
When the cone isn’t full to the top, I’d spin the cone.
This way I make sure that the coffee bed is flat.
A flat coffee bed means that the coffee extraction is even.
7. Wait for the cofee to draw down and enjoy!

Once you’ve gone through the previous steps, all you have to do is wait. In a minute or so, your Hario V60 coffee will be ready!

You can always make adjustments to the V60 brewing variables if you don’t like how your coffee turned out.
If your Hario coffee tastes burnt, too harsh and bitter – grind coarser and/or decrease the water temperature.
If it’s too sour and unpleasantly weak – grind finer and/or increase the water temperature.
Final Words
I hope that you found this Hario V60 recipe helpful.
I made sure to include some basic brew guide tips that will make it easier for you to make outstanding V60 coffee at home.
Of course, make sure you get some high quality coffee beans from your local roaster!
After all there’s no better coffee than the one made with freshly roasted beans that were produced with care.
If you’re a beginner coffee enthusiast, and you’re just starting to learn more about the vast world of coffee – don’t get overwhelmed by the new information. Take your time.
Above all, I assure you that it’s worth putting a bit more effort into your coffee brewing routine. It’s quite rewarding. Furthermore, my morning coffee ritual has a great therapeutic effect and helps me gather my thoughts and enjoy a moment for myself. A brewing guide that shows how to make coffee in a Hario V60 pour-over device, by following an easy recipe. If you don't have a scale, don't worry - use 4 tablespoons ground coffee (medium-fine grind) for every 2 cups (16 fl. oz.) of hot (off-the-boil) water. For more tips and detailed explanation of the steps in this brew guide, check out the whole article. You will find tips on Hario V60 grind size, coffee ratio, water temperature, drawdown time, and more. As an Amazon Associate and member of other affiliate programs, I earn from qualifying purchases.
Hario V60 Recipe: Step-by-step Brew Guide
Ingredients
Instructions
Notes
Recommended Products