A while back I came across a Reddit post from a user, who found that using the AeroPress as an improvised ice drip coffee tower works surprisingly well.
So I decided to try out this peculiar AeroPress technique and see if I like it.
I’ve heard about the possibility of using the AeroPress as a slow drip cold brewer before. Nonetheless, I thought this could only work through the use of an attachment, such as the PUCKPUCK. I did some experimenting and I found that you don’t really need any additional gear to prepare a bright yet flavorful cup of cold drip coffee with your AeroPress.
In this post, I’ll share my findings and a few tips that you may find useful. You’ll see a guide on how to use your AeroPress to make delicious drip cold brew coffee.
So let’s dive in.
Related Posts:
Cold Brew Ice Drip Coffee with an AeroPress: Step-by-step Instructions
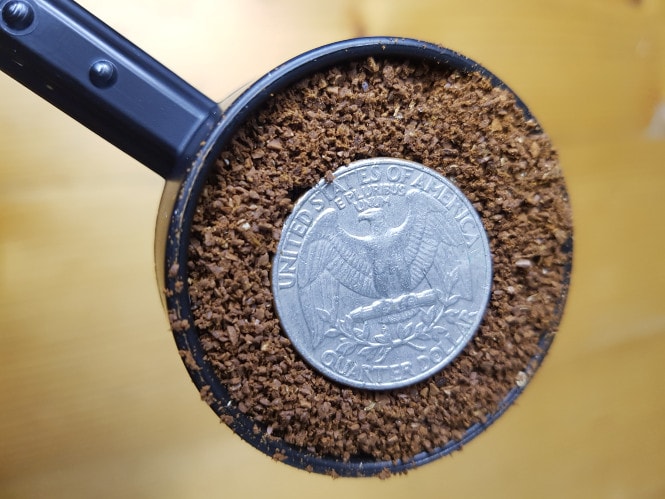
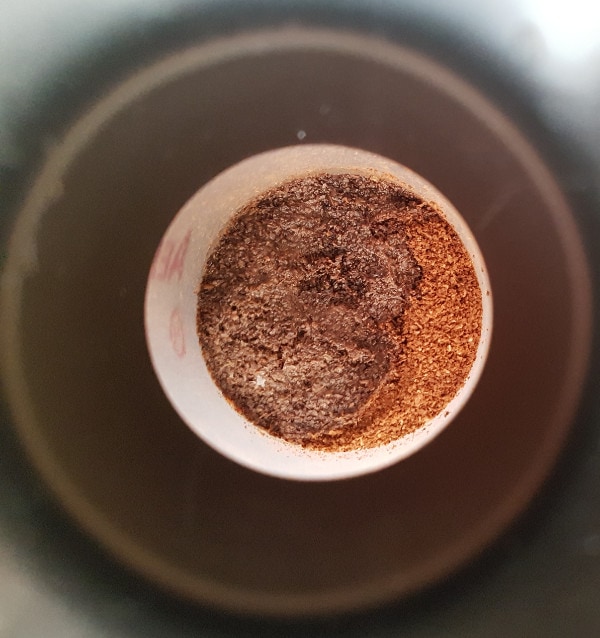
To make cold drip coffee in my AeroPres,s I use a fine grind (the one I’d normally use for AeroPress coffee). You can see the ground coffee that I utilize in the photo below.
When it comes to coffee to water ratio, I found that I prefer making cold drip concentrate with 18 grams of ground coffee and 90 grams of ice cubes.
If you don’t have a coffee scale, I recommend using a heaping AeroPress scoop of grounds.
With that being said, you can fill the AeroPress brewing chamber and the funnel with ice cubes to the top. By doing so you will get a regular serving of cold brew that doesn’t need dilution.
So here’s my step-by-step guide on how to make ice drip AeroPress cold brew coffee:
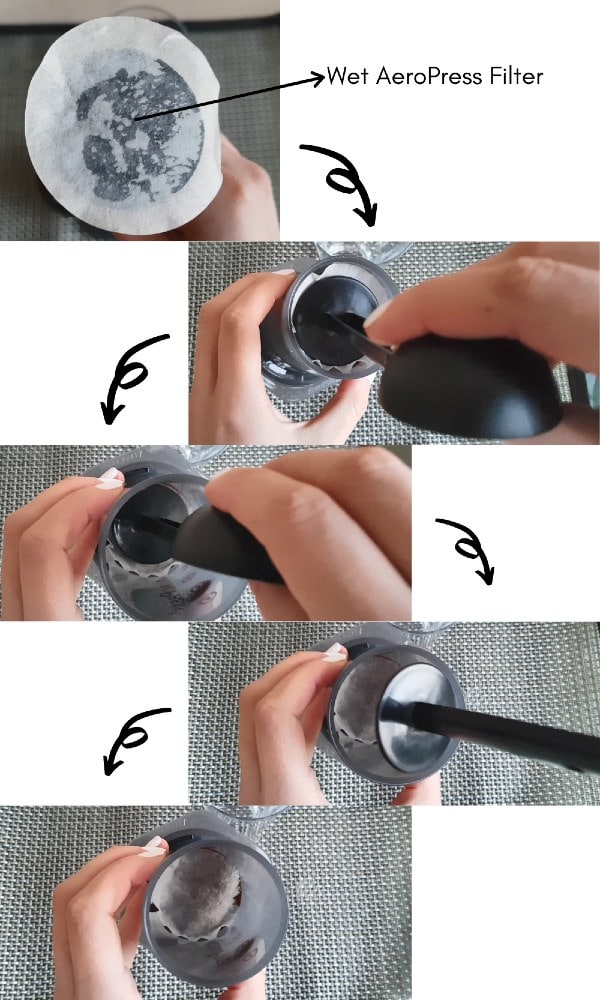
1. Rinse your AeroPress paper filter and place it onto the filter cap
Pre-wetting is usually done to avoid the papery flavors that may end up in your brew if you don’t rinse the round AeroPress filter.
Still, these paper disks are rather thin and won’t really have a significant impact on your coffee’s flavor.
So don’t worry if you forget to rinse the filter before brewing.
Related Post: Best AeroPress Filters and Alternatives – Guide & Reviews
2. Screw the filter cap onto the AeroPress brew chamber
Of course, you should also place the AeroPress on top of a cup or a glass that will collect the delicious coffee, dripping down from the brew chamber.
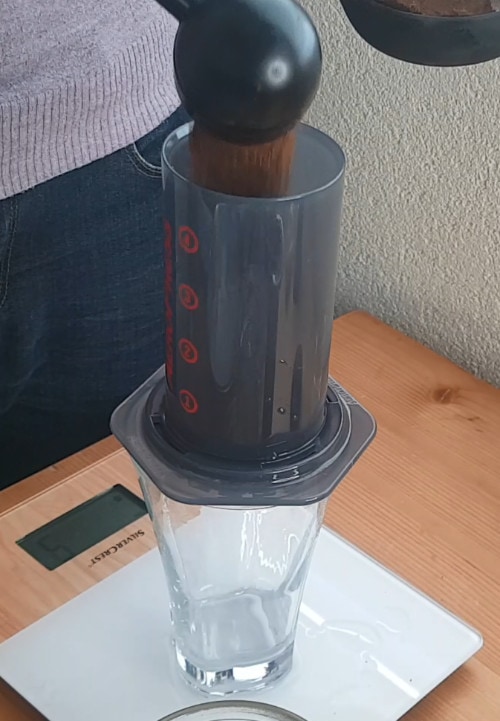
3. Add 18 grams of ground coffee beans to the brew chamber
As I mentioned earlier, in case you don’t have a scale at hand, use a heaping AeroPress scoop.
4. Rinse another paper filter and place it on top of the coffee grounds
I’ve tried making this cold drip ice brewed coffee without placing another filter on top of the coffee bed.
Nonetheless, I found that the second filter is needed to ensure the proper distribution of the water throughout the grounds.
If you don’t place it, part of the coffee bed may not even come in contact with the water, which will lead to uneven extraction and not-so-satisfying results.
To place the second filter on top of the coffee grounds I used a plastic scoop/tamper which probably came as an addition to an espresso machine that I’ve previously bought.
It fits the AeroPress brewing chamber perfectly well and you can check it out on Amazon by clicking here.
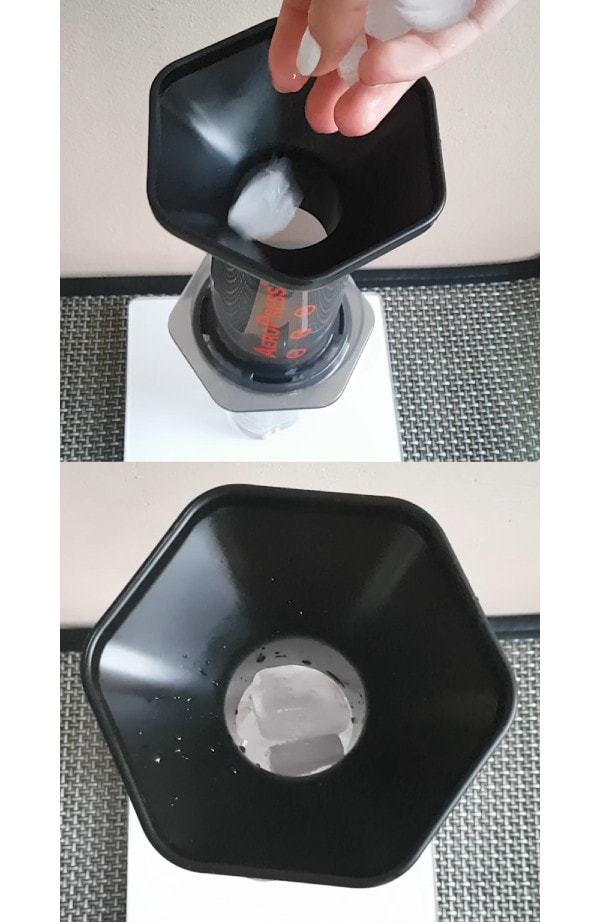
5. Put the AeroPress funnel in place
Especially if you decide to use more than 90 grams of ice cubes, you will definitely need to place the funnel on top of your AeroPress.
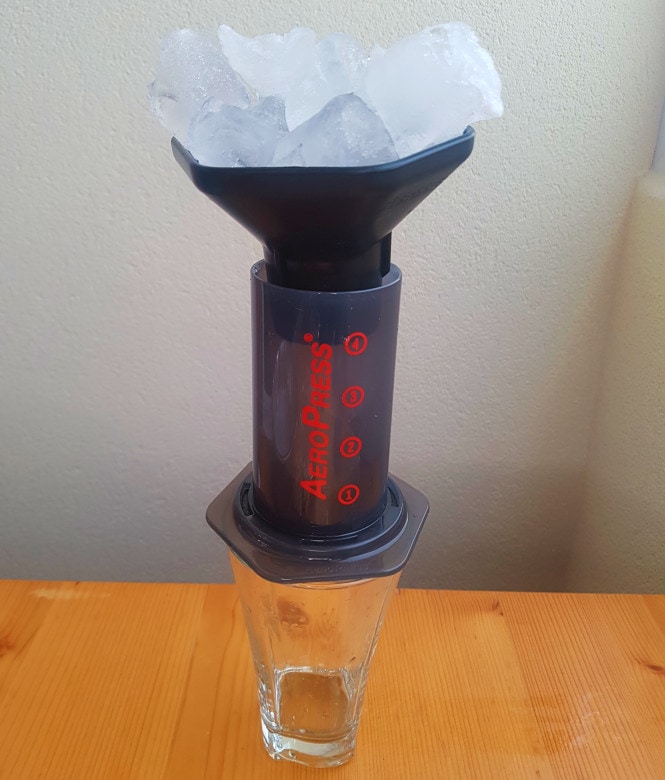
It serves as an ice holder. Once the ice cubes start to melt, the water starts to slowly drip down onto the coffee grounds, extracting them.
6. Add 90 grams (3.17 oz) of ice cubes to the brewing chamber
You can actually fill the AeroPress brewing chamber and the funnel with more than 250 grams (8.8 oz) of ice cubes, which will result in a yield of around 200 grams (around 7 oz).
I prefer making a cold drip coffee concentrate with 90 grams (3.17) of ice cubes. When I do so, the yield is around 60 grams (2.11 oz).
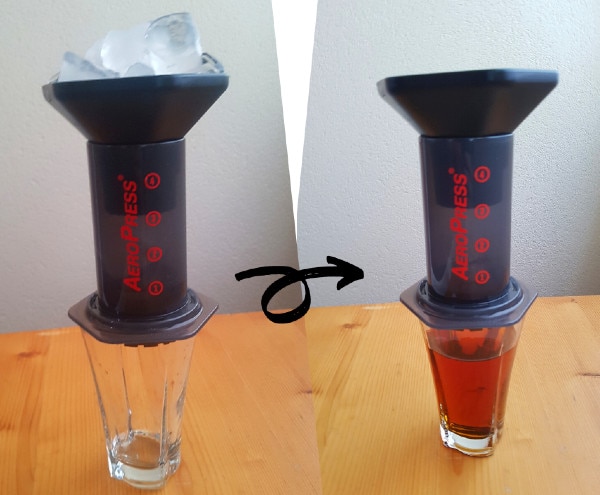
7. Wait overnight for the ice cubes to melt and for the coffee extraction to occur
The duration of the brewing cycle depends on the temperature of the room where you leave the AeroPress overnight. The higher the temperature, the faster the brew time. I found that the best results in terms of flavor come when I leave the AeroPress ice tower in a cold area. This way the melting occurs at a slower rate, which yields a stronger brew.
If you use a lot of ice cubes for this recipe, here’s what the ice drip coffee would look like:
You can see that the brew is lightly-bodied, which is common for cold drip coffee. You will be more than pleased with the results in terms of flavor and strength. I recommend experimenting with different coffees, especially ones with fruity notes as this method of extraction complements such flavor profiles.
8. Dilute the concentrate and enjoy
You can also dilute the concentrate with milk. Furthermore, since cold brew coffee can also be served hot, you can dilute the concentrate with hot water too, if you feel like it.
Final Words
I hope that you found my guide useful. The AeroPress ice drip cold brew method is for anyone who loves to experiment with coffee at home. Leave me a comment below and share your input or ask me a question regarding this guide. Find out how to turn your AeroPress into an ice drip coffee tower. By following this guide you will get to have a flavorful cup of cold brew coffee at home. *If you don't have a coffee scale, use a heaping AeroPress scoop. *You can fill the AeroPress brewing chamber and funnel with more than 250 grams (8.81 is) of ice cubes if you wish. I prefer using fewer ice cubes, which results in a cold brew coffee concentrate. I dilute it with either iced water, hot water, or milk. As an Amazon Associate and member of other affiliate programs, I earn from qualifying purchases.
AeroPress Cold Drip Ice Brew Coffee
Ingredients
Instructions
Notes
Recommended Products

