If you love enjoying a high-quality cup with a great mouthfeel and complex, yet balanced flavor profile, this Japanese pour-over dripper will match your sophisticated taste.
I’ve been regularly using the Hario woodneck drip pot for over a month, so I decided to share my experience in a detailed review. Here you will find a general overview of the nel drip pot and the coffee it produces.
Furthermore, in this guide, you can find useful Hario woodneck recipe instructions and brewing tips that have helped me achieve wonderful results. I touch on many variables, such as grind size, water temperature, pouring technique, and type of coffee beans.
In addition, we need to discuss how this coffee maker compares to other pour-over devices, such as the Chemex or the Hario V60. And not only are we talking about mouthfeel and flavor, but we’ll compare the devices in terms of maintenance and ease of use.
Moreover, I share some helpful suggestions on how to upkeep the flannel cloth coffee filter.
So without further ado, let’s dive in.
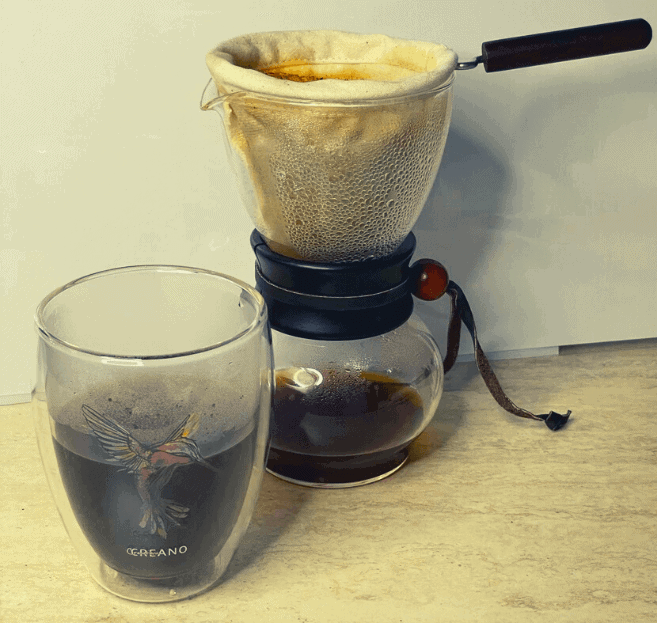
Hario Woodneck Drip Pot: General Overview
The woodneck drip pot by the brand Hario is often referred to as “nel dripper”.
This nickname derives from the fact that the pour-over brewer uses a flannel coffee filter.
The cloth is actually the most impactful feature of the Hario woodneck pot. It makes it stand out from many other coffee-making devices.
But before we go into more details, it’s worth noting what you’ll get by purchasing this pour-over maker.
The Hario drip pot actually comes in two sizes:
- 240 ml (~8 fluid ounces), also known as the 2-cup. The standard pour-over serving is 4 fl. oz. (120 ml.). Nevertheless, most consumers (myself included) consider this brewer a single-serve coffee maker.
- 480 ml. (around 16 fl. oz.), marketed as a 4-cup, but it’s mostly used as a 2-cup.
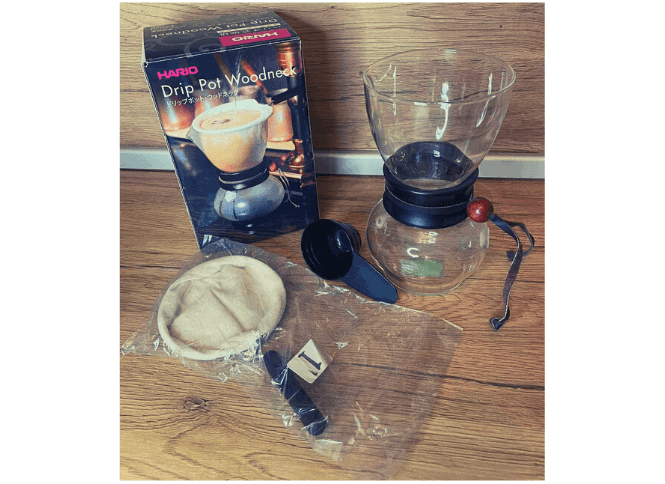
By purchasing the Hario nel drip set, you will get:
- Borosillicate glass drip pot with an olive wood neck. The wood neck also has a leather strip going around it. This completes the simple, yet appealing design.
- Plastic measuring scoop
- The cloth filter
You can check out the price of the Hario Woodneck Drip pot on Amazon by clicking here.
So let’s review the nel dripper by looking at its different aspects.
1. Flavor: The Impact of Using a Cloth Filter for Pour-Over
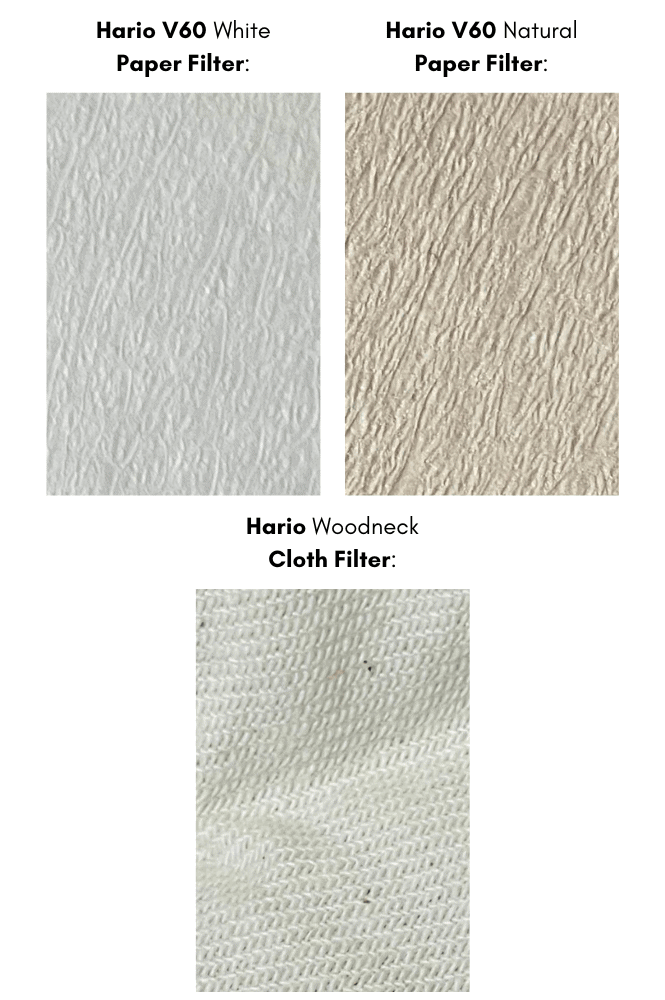
Just like paper coffee filters, the cotton flannel of the Hario woodneck drip pot doesn’t let any coffee grounds pass through it. At the same time, since there are bigger gaps between the fibers of the cloth, more coffee oils get into the brew. This results in the perfect combination of rich mouthfeel and clarity.
Here is a photo of Hario V60 filters and the Hario cloth filter from up close:
Similar to the V60 and the Chemex, the Hario nel drip is great at extracting all the subtle flavors from your coffee beans.
But with it, you will get a different coffee experience because it results in a fuller-bodied cup.
This is the only brewing method that perfectly merges flavor complexity, creamy texture, and brew cleanness.
In terms of mouthfeel, the Hario woodneck drip brew is akin to French press coffee. Nevertheless, you won’t get any silt in your cup.
2. What are the Best Coffee Beans for Hario Woodneck Drip Pot?
I love using washed coffees with complex floral/fruity flavor profiles with the nel drip. The device is exceptional at bringing out subtle flavor notes and highlighting the origin character of my favorite Ethiopian and Kenyan beans.
What’s more, I found that the Hario woodneck pot is perfect for not-so-freshly roasted leftover coffee.
If your coffee beans have started going stale, I recommend switching to the nel drip.
The device will let you enjoy what otherwise would be considered wasted coffee.
It will bring out the character that you may have thought is lost.
Moreover, you will get more body, and even discover new origin, variety, and roast flavors that you’ve never noticed while using paper filters.
This is another reason why I think owning a Hario Woodneck drip pot is worth it. Even if it’s not your go-to day-to-day coffee maker, it lets you explore different aspects of the coffee beans you have.
And this is quite exciting for virtually any passionate coffee connoisseur.
Even though I’d normally go for light roasts, the nel drip is also great at adding complexity to darker roasts as well.
I’ve used it to prepare a brew with medium-dark naturally processed Colombian coffee beans. The result was a full-bodied bold cup with perfectly balanced flavor and dried fruit undertones.
What I’m trying to say is that I recommend experimenting when it comes to the type of coffee beans you’re using.
It’s hard to go wrong with the nel drip. So explore different varieties, roasts, and processing methods, until you find the coffee beans that you enjoy using the most.
3. Cleaning and Maintenance
Even though the Hario Woodneck drip pot is arguably the best at producing an exceptionally flavorful, yet balanced cup with great texture, it’s not a commonly used device.
This is so because maintaining the flannel coffee filter requires more time and effort.
The cotton can easily adhere bad mildew smell and ruin your brew’s flavor. And no one wants their coffee to have rotting wood aroma notes and smel like mold.
The good news is that you can easily build a cleaning and maintenance routine for the flannel filter.
Once you get used to it, you can enjoy Hario woodneck coffee either daily or every once in a while.
So here’s how to clean and maintain a Hario flannel filter:
- After use, discard the coffee grounds and give the cloth a good rinse.
It will take some time to remove the fines from the fabric. There will be a few stuck in between the fibers of the cloth, so try to remove as much as possible.
Keep in mind that there will always be some stuck coffee particles that you can’t seem to rinse out, and that’s totally fine. - Place the Hario cloth filter into a glass, filled with water and leave it in the fridge.
Make sure the cotton is fully submerged. Keep it that way until the next time you want to use it. Each time you take the filter out of the glass, rinse it thoroughly prior to brewing.
Another way to avoid mildew buildup between uses is to store the flannel in a Ziploc bag in the freezer. This is the better option if you aren’t to use the nel drip daily. Once you want to prepare a cup, you should take the filter out of the freezer and thaw it by rinsing it with hot water under the tap. - Perform a deep clean every once in a while.
With time you will notice some stains appearing on your cloth filter. These are coffee oils that can easily be removed with a product like the Cafiza cleaning powder. By dissolving a teaspoon of the product in a glass of water, and soaking the Hario cloth filter in, you will get rid of the staining.
Another way to perform a deep clean is by boiling the cloth filter in fresh water for 10-15 minutes.
Some consumers would report that they don’t experience any mildew issues even if they simply leave the Hario cloth filter to dry out.
The thing is that air humidity can fluctuate through the seasons or be influenced by other factors.
The flannel may be drying out perfectly fine between uses without any drawbacks for a couple of months.
But at some point due to changes in air humidity levels, it may start accumulating mildew.
And one morning you may get unpleasantly surprised by your cup’s ruined flavor. To avoid that, stick to one of the recommended approaches of in-between-use maintenance.
If you’re not passionate about coffee you may find that owning and using a nel drip isn’t worth the hassle.
Nevertheless, if you’re a coffee connoisseur who’s rigorous about your cup’s flavor and mouthfeel, the time investment of upkeeping a Hario woodneck drip pot will pay off.
Hario Nel Drip Brewing Tips
To achieve the best results with the nel drip pot, I’ll share some coffee-to-water ratio, grind size, and brew temperature recommendations.
Keep in mind that these tips you can use as basic guidelines, but you should play around with the variables until you’re completely satisfied.
1. Coffee-To-Water Ratio
To make coffee in the Hario woodneck drip pot, I recommend starting out by using the common for pour-over brewing coffee-to-water ratio of 1:17.
I’d normally use 15 grams of coffee for 250 ml. of water when brewing with light roasts.
To add more flavor complexity when brewing with darker roasts, I’d increase the coffee dose a bit.
In other words, I’d use the 1:14 coffee-to-water ratio. This translates to 18 grams of medium-darkly roasted ground beans and 250 ml. of water.
Some nel drip owners would even argue that the 1:8 ratio is ideal when using dark roasts with this pour-over device. Nevertheless, I’m a bit hesitant to waste that much coffee, considering that the high dose doesn’t improve my satisfaction levels massively.
Nevertheless, keep in mind that using a scale is important if you want to achieve consistently good results with your Hario woodneck drip pot.
Related Post: Best Scales for Coffee
2. Grind size
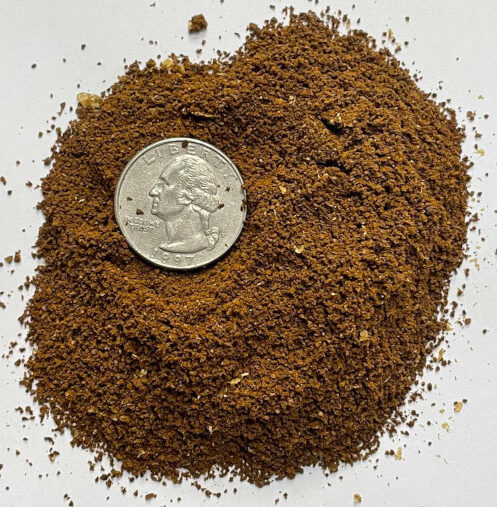
The medium-fine grind size is your best bet when brewing with the Hario nel dripper. Still, I’d recommend grinding a bit finer than what you’d normally go for when using a V60, or another paper-filter pour-over device. The coffee tends to pass through the cloth filter faster compared to paper. The finer grind will have a good impact on the extraction process because it will slow down the drawdown. The slower the rate of the water passing through the grounds, the better the extraction.
In the following photo, you can see the grind that I used for the recipe in this post:
The darker the roast, the easier it is to extract the coffee compounds.
If you grind dark roasts too fine, you may over-extract some substances that will throw the final brew flavor off balance.
The grind uniformity is also of great importance when it comes to flavor. The better the grind quality, the more even the extraction.
If you want to uncover the maximum potential of your Hario woodneck drip pot, invest in a grinder that can produce a consistent grind at coarser settings.
You can check out my guide on the best grinders for pour-over coffee for some great product recommendations and their reviews.
3. Water Temperature
For light roasts I recommend using 200°F – 205°F (93 °C – 96°C) water, which is pretty much off-the-boil water.
It’s worth noting that it’s easier to over-extract darkly roasted coffee beans and consequently let unpleasant bitter flavors into your cup. So when brewing with medium-dark roasts, use a lower temperature of 185°F – 194°F (85°C – 90°C).
For more control over the brewing temperature and pouring technique, you can get a temperature control gooseneck kettle, such as the widely known Fellow Stagg EKG.
Related Post: Best Gooseneck Kettles
Author’s Note: The quality of the water you use is also important if you want to achieve impressive results in terms of flavor.
The water should be fresh, odorless, and free of chlorine.
Furthermore, its mineral content also has an impact on the extraction and the final flavor.
For more insight, you can check out my guide on the best water for coffee.
4. Drawdown
Due to the wider gaps between the fibers of the cloth, the nel drip pot has a faster drawdown time compared to other pour-over devices that use paper filters.
I’ve found that I achieve the best results with total brew time within the range of 2:30 – 3:00 minutes (for 250 ml of water).
Nevertheless, don’t be alarmed if you go over or under this time frame. As long as you’re happy with how your coffee turns out, everything’s fine.
Author’s Note: Keep into consideration that drawdown time also depends on water temperature and agitation. The higher the temperature, and the stronger the disruption of the coffee bed during brewing – the faster the water passes through the grounds.
How to Make Coffee in a Hario Woodneck Drip Pot: Instructions
Making coffee in a nel drip pot is a process that’s akin to brewing with other pour-over devices. Still there are a few extra steps that need to be considered.
For the purposes of this guide, I used my 2-cup Hario device.
So here’s how to prepare a cup with the Hario Woodneck Drip Pot:
- Place the filter onto the carafe and rinse it with hot water.

- Swirl the decanter to pre-heat it with the rinse water and discard rinse water.

- Sit the device on a coffee scale and tare it.

- Add 15 grams of ground coffee (medium-fine grind).

- Shake the filter to even the coffee bed and create a well in the middle of the coffee bed.

- Zero out the scale and start a timer.

- Pour 40 g of off-the-boil water (for light roast). In case you use a different coffee dose, go for the 1:2 or 1:3 coffee-to-water ratio for the first pour. This means that for 15 grams of coffee you should pour 30 to 45 grams of water.

- Grab the carafe and swirl to saturate the grounds. Wait for the coffee to degas and drawdown. This is the blooming phase.

- Start a second pour (130 g. water) at 45 seconds. After the second pour the scale should show 170 grams. You should be done with your second pour by 1 minute and 15 seconds.

- Start a third pour (80 g. water) at 1 minute and 45 seconds. After the third pour the scale should show 250 grams. The third pour should be completed by the moment the timer shows 1 minute and 45 seconds.

- Swirl the device and leave it to drawdown.

- Remove the filter and pour the coffee into a pre-heated cup. Enjoy!


The drawdown of this particular pour-over brew was 2 minutes and 45 seconds. I used lightly roasted Ethiopian beans and the result was a flavorful cup with satisfyingly smooth texture. The yield was 215 ml.

Final Words
I hope that you found my comprehensive review of the Hario Woodneck Drip pot helpful.
If you have any further questions, please leave me a comment below.
What’s more, feel free to share your tips and experience with this exceptional pour-over nel drip device.
I’d love to learn from your observations and discuss them further.
For your convenience, below I’ve also included a recipe card that summerizes the whole brewing process. A cup of coffee, prepared in a Hario nel drip, combines flavor complexity and smooth texture in an exceptional way. Because of the flanner filter, the Hario woodneck drip pot will make it easy for you to make a delicious and balanced cup of coffee. *I recommend increasing the coffee dose to 18 grams, if you are using a dark roast. *The grind should be a bit finer than what you'd normally go for when making coffee witha pour-over dripper that uses paper filters (such as the V60). *For better results in terms of flavor use 185°F – 194°F (85°C – 90°C) water when making coffee with darkly roasted coffee beans. *Drawdown time should be within the range of 2:30 minutes and 3:00 minutes. For photos on the brewing process and a detailed Hario Woodneck Drip Pot review, check out the whole article.
Hario Woodneck Drip Pot Coffee
Ingredients
Instructions
Notes